-
Measuring the window
Whether you want to make an opening screen or a non-hinged, fixed screen, you need to know the measurements. First of all measure the height and width of the window frame between the walls. Allow 10 mm extra so you can easily fit the frame of the fly screen.
-
Wooden fly screen
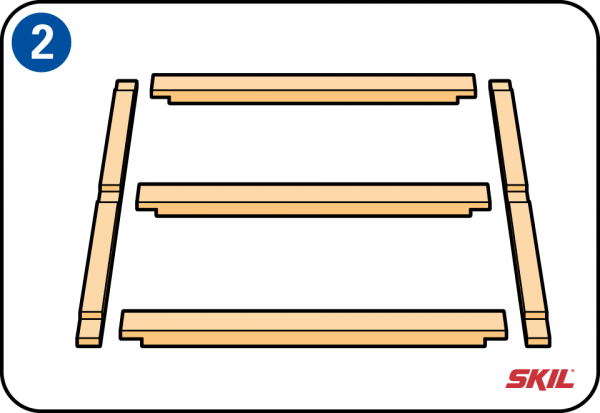
You can make the frame onto which you are going to fix the gauze from wooden laths. These should have a width of 40 mm and a thickness of 20 mm. Fix the laths together with half-lap joints. You can also use different wood joints, but then you may need to use thicker laths.
-
Cross-pieces
Make two long laths (the same length as the height of the window) and three short laths (the same length as the width of the window). The third lath is fitted in the middle of the screen to strengthen the frame. Make half-lap joints at the ends of the two long laths with the same width as the cross-pieces (40 mm). Then do the same with the three short laths.
-
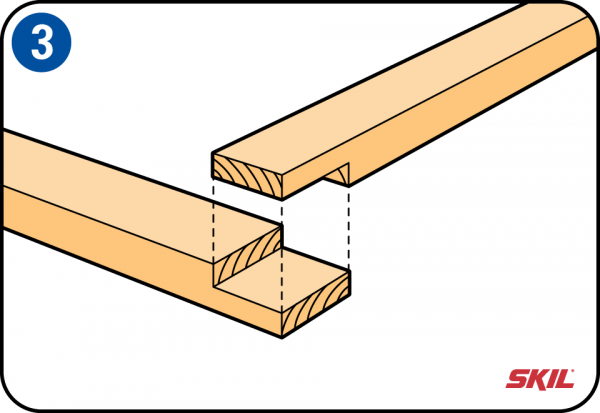
Half-lap joints
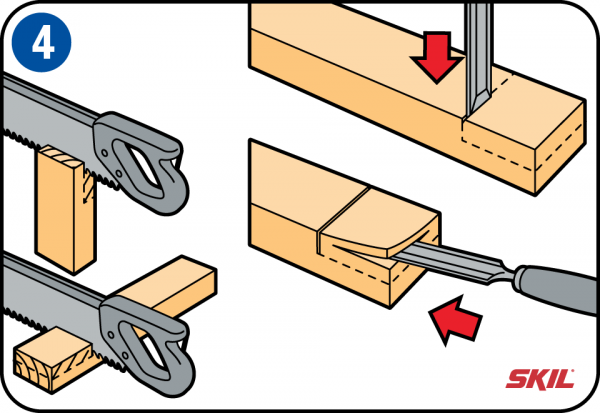
You can make half-lap joints with a mitre saw. Fix the lath upright in the workbench and first saw vertically into the end. Then fix the lath horizontally and make a saw cut to half the thickness of the lath, so that a piece half the thickness of the lath is removed. You can also cut out these pieces with a wood chisel or a router. Use a try square to mark out the cutting lines, making sure you mark out the lines accurately.
-
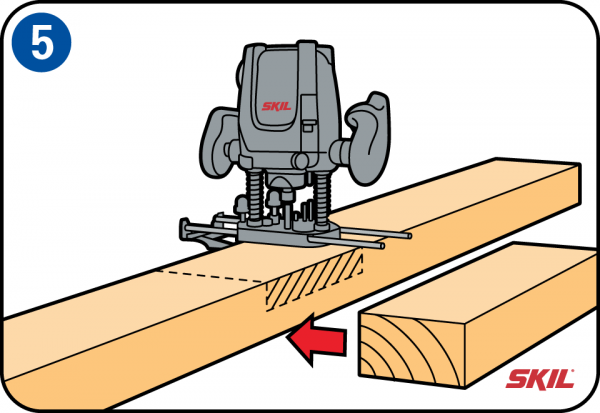
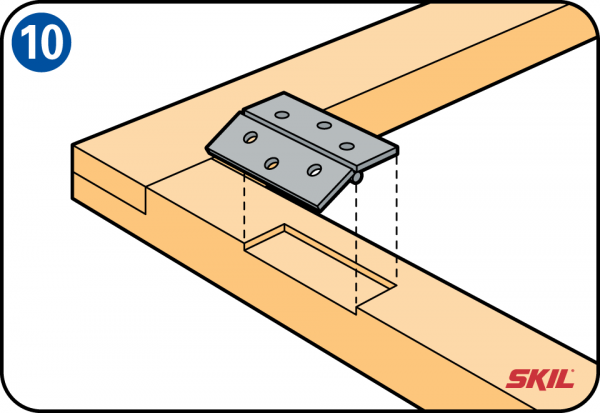
Making cut-outs in the frame
The central cross-piece has to be fitted in the middle of the two long laths. That means that cut-outs to half the depth need to be made in these laths. You can do this with a router. Set the depth stop to this depth. Make the cut-outs in two stages to avoid overloading the router and burning the wood. First mark out the cutting lines with a try square, and start cutting at the marked lines. Place a cut-off piece of the lath next to the workpiece to guide the machine and help you to cut in a straight line.
-
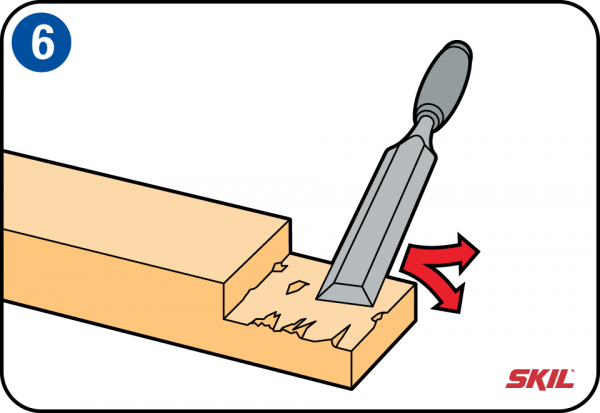
Wood chisel
The best way to remove any irregularities is with a wood chisel. When you have made all the half-lap joints, place the frame on the floor and check that everything fits.
-
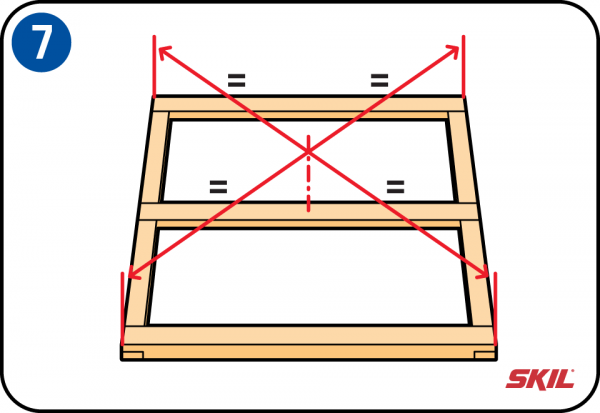
Assembling the frame
Assemble all the joints with wood glue and screws, and check that the corners of the frame are square. You can do this with a try square or by checking that the diagonals are equal in length. Also check that the frame is a good fit for the gap between the walls before tightening the screws firmly. To prevent splitting of the wooden laths it’s a good idea to pre-drill the screw holes using a drill with a smaller diameter than the screws. After assembly you can finish the frame with a coat of paint or varnish.
-
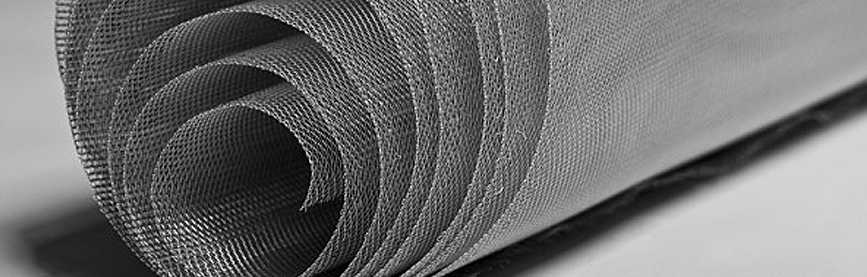
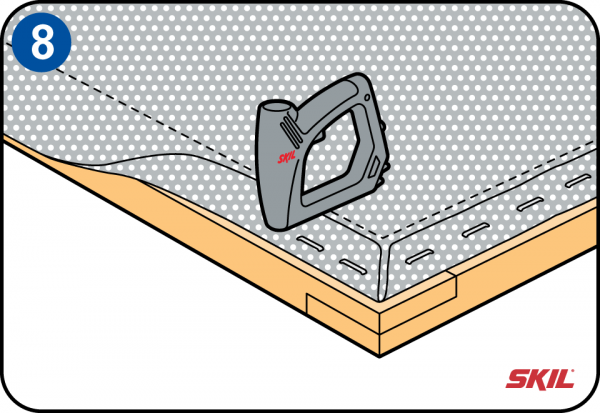
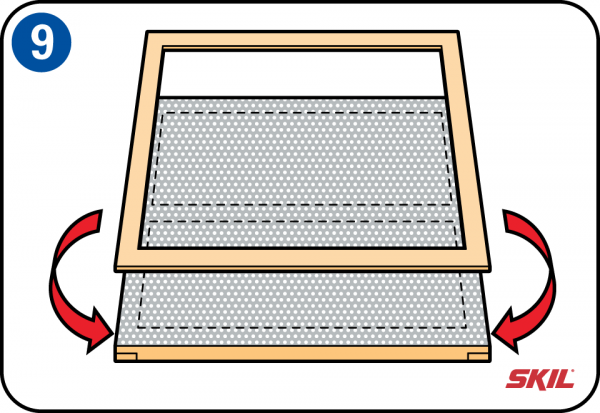
Tensioning and fixing the gauze
Lay the gauze on the frame and trim it all round to 5 cm more than the frame itself. Fold the excess gauze back and fix it along the top with a tacker or electric staple gun. Use one staple every 5 cm. Pull the gauze downwards as tightly as possible, then staple the sides to the frame. Try to keep the gauze tensioned so that it fits without creases and the gauze pattern is parallel with the frame.
-
Finishing
You can hide the staples from view by screwing thin covering laths of the same width onto the frame. Saw these to length and finish them with paint or varnish in the same color as the frame. To prevent splitting of the wooden laths, first pre-drill the screw holes using a drill with a smaller diameter than the screws.
-
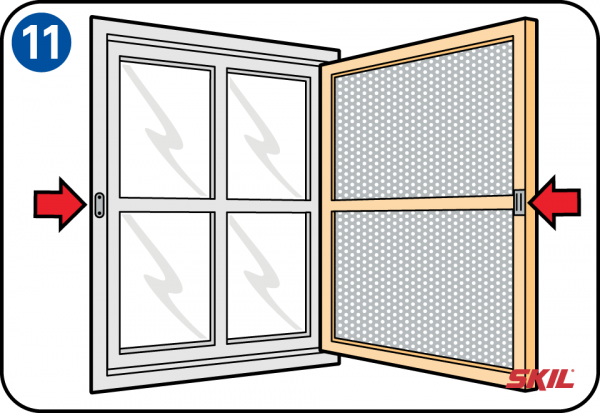
Fitting the hinges
Check on which side of the window (or door) the hinges are located. The hinges of the fly screen have to be fitted on the same side. Before you start, first mark out the screw holes for the hinges and then pre drill the screw holes using a drill with a smaller diameter than the screws.
-
Closure fly screen
After fitting the screen, you can fit a magnetic catch to keep it closed. Fit the magnetic catch itself on the fly screen frame, and fit the metal plate in the corresponding position on the window frame.